Here is how to replace the cabin/dust filter in a W202 C-Class Mercedes-Benz vehicle:
Tools required:
Phillips-head screwdriver
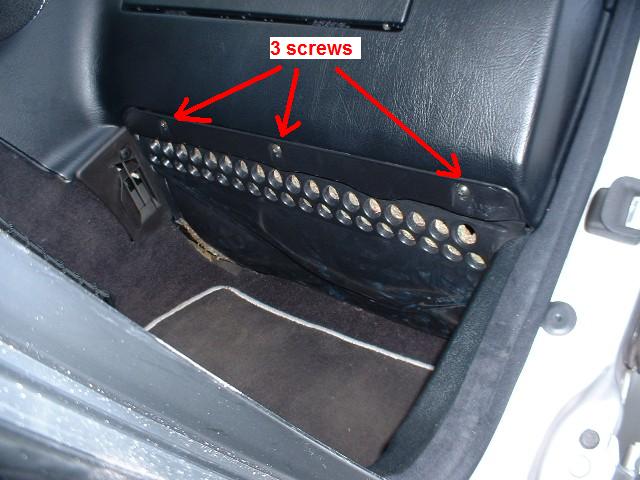
Remove the panel below the glove compartment by removing the three Phillips screws, and then pulling the panel down and towards the passenger seat. There is a slotted tab in the front and pulling it straight back will allow the tab to slide out of the slot.
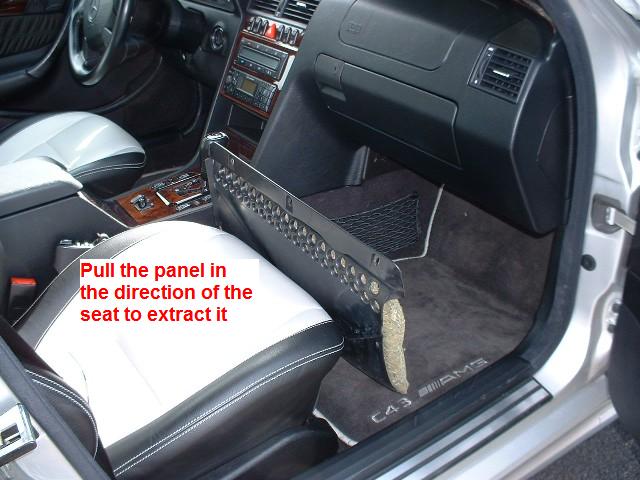
Now slide the covering panel straight back towards the passenger seat:
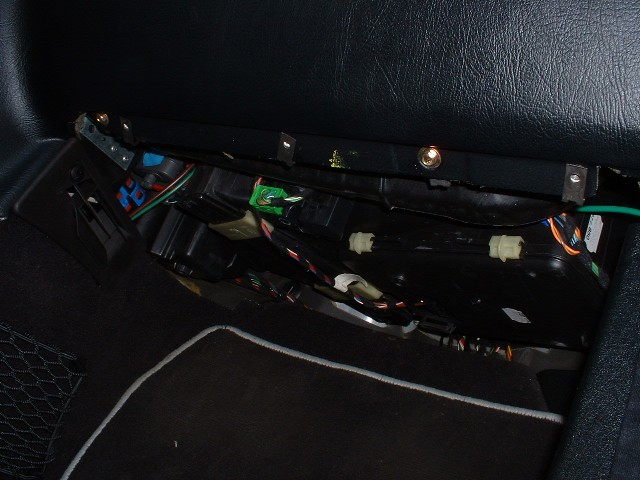
Now where to begin? It's hidden in here somewhere in a secret place... :)
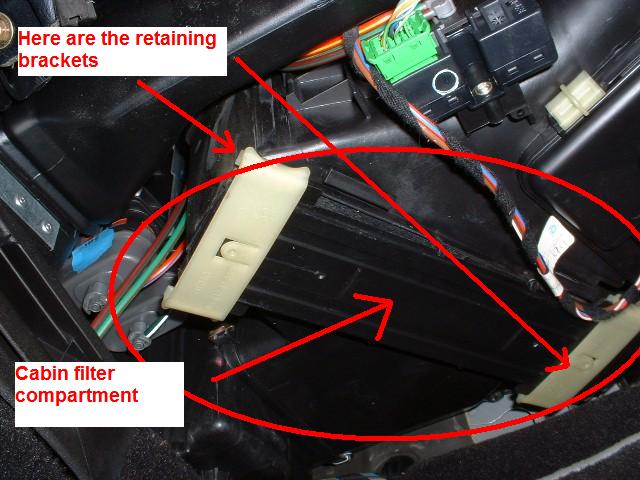
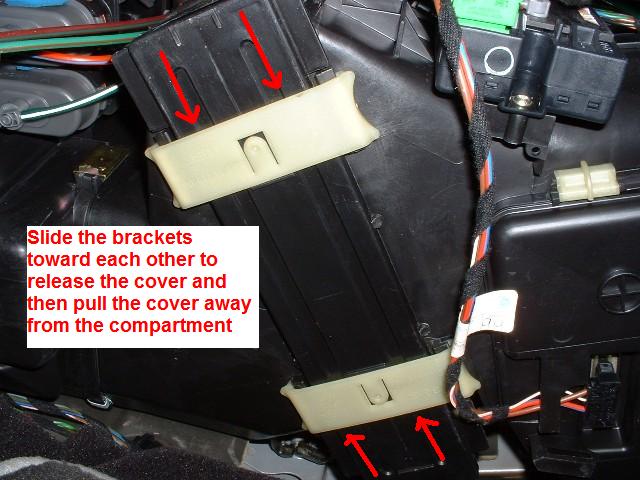
The cabin filter compartment is at an angle. It's rectangular in shape and has two plastic retaining brackets that hold the compartment cover on:
Remove the compartment cover:
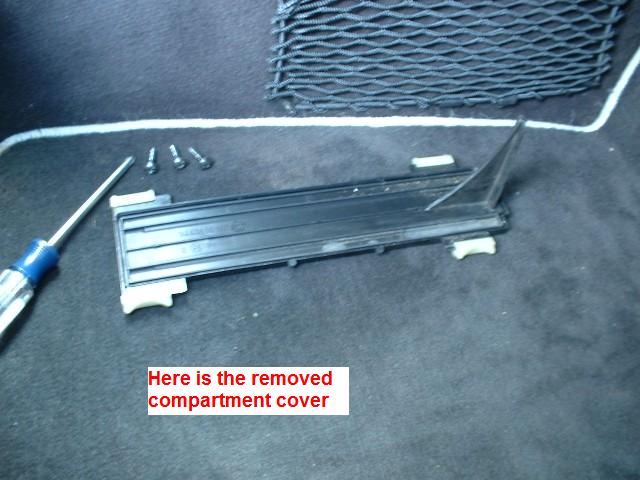
Here is what the removed cover looks like:
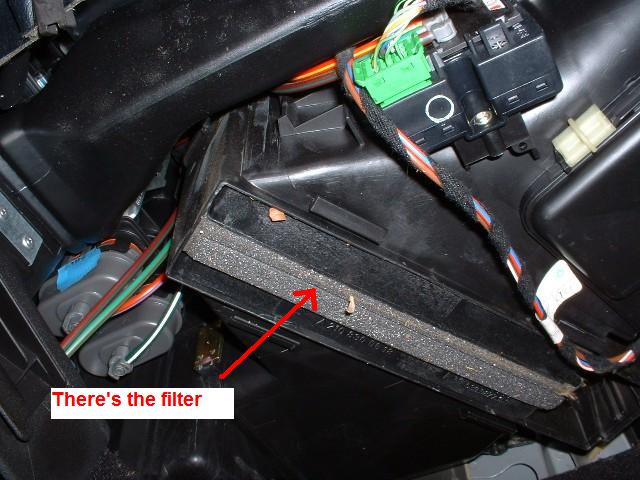
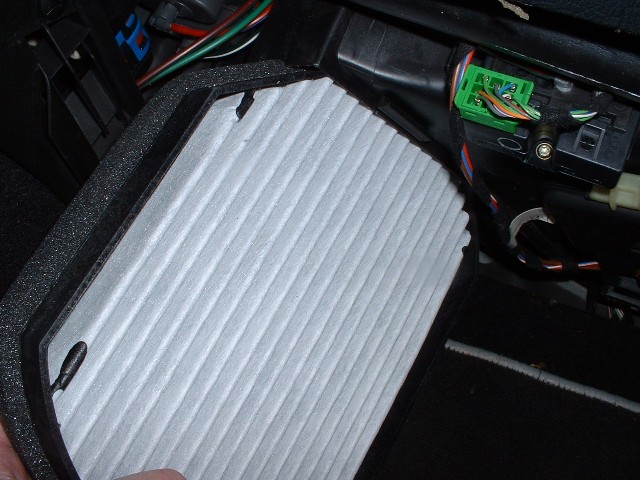
With the cover removed, you can now see the old filter:
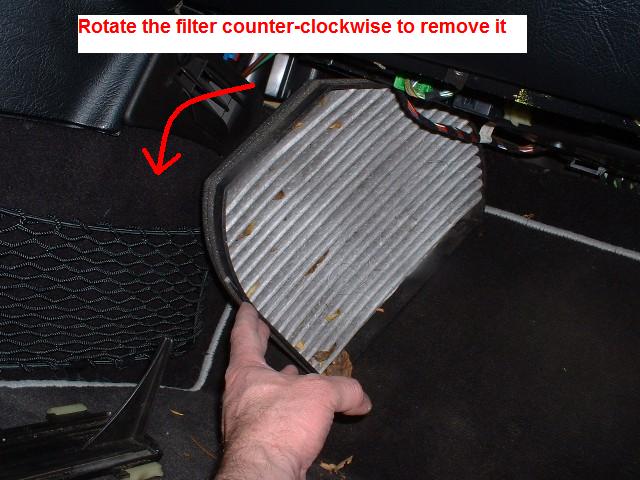
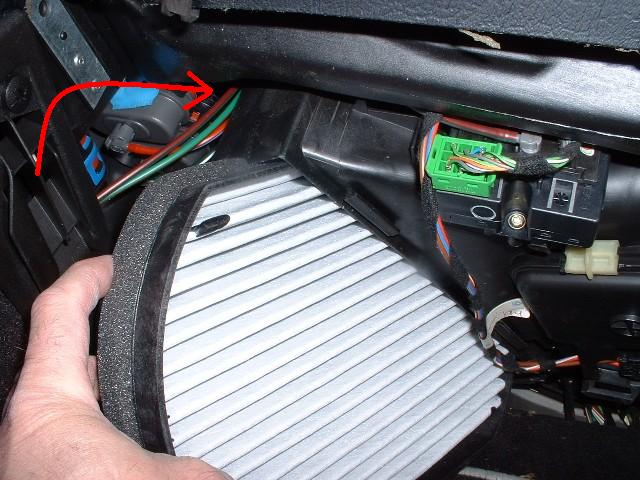
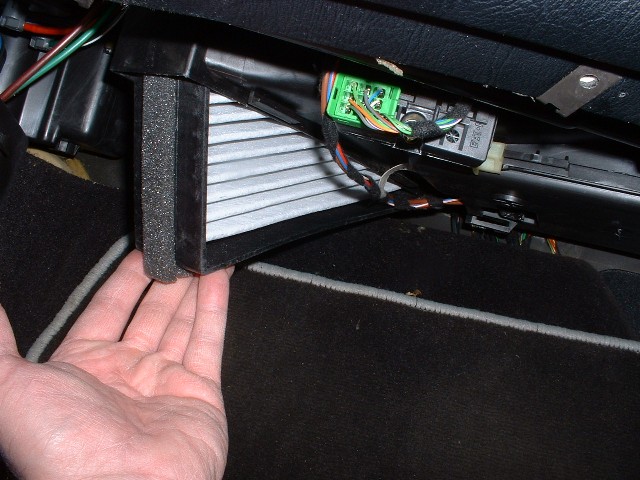
Pull the filter down out of the compartment:
As the filter is pulled down, rotate is counter-clockwise to remove it:
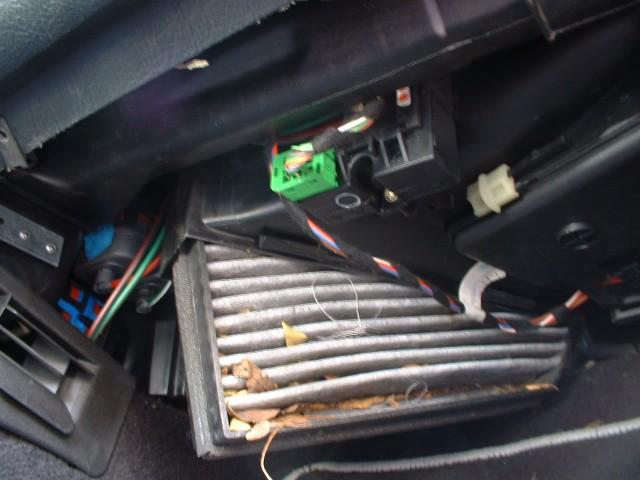
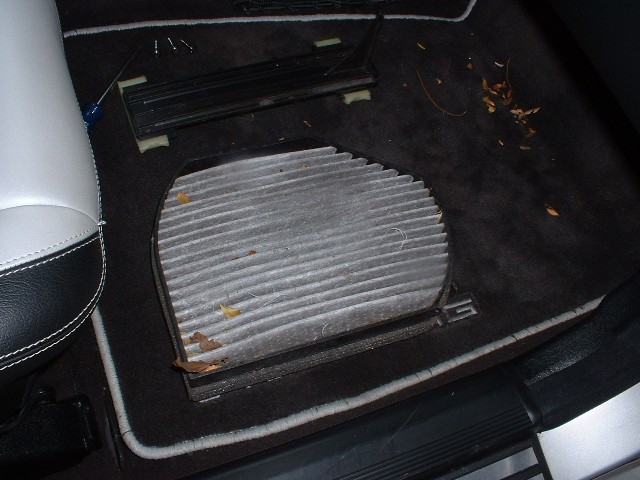
There will probably be some leaves and debris in the old filter:
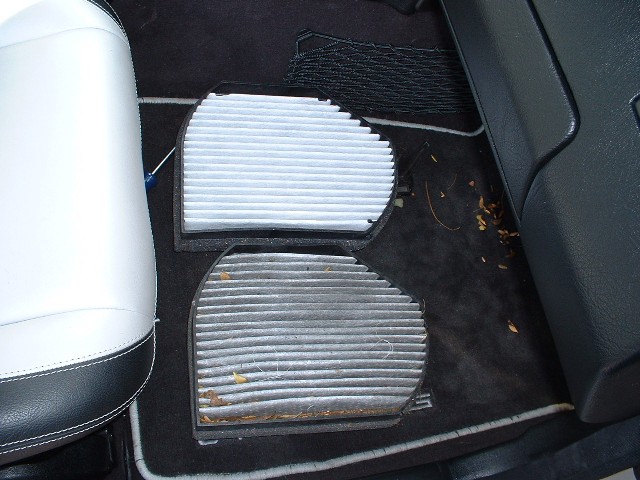
New vs. old:
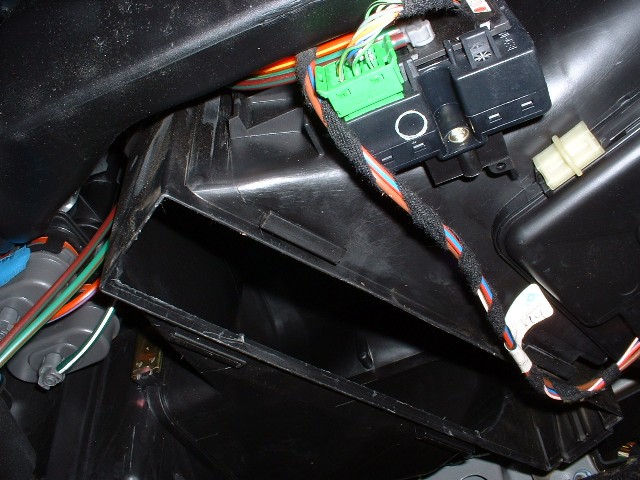
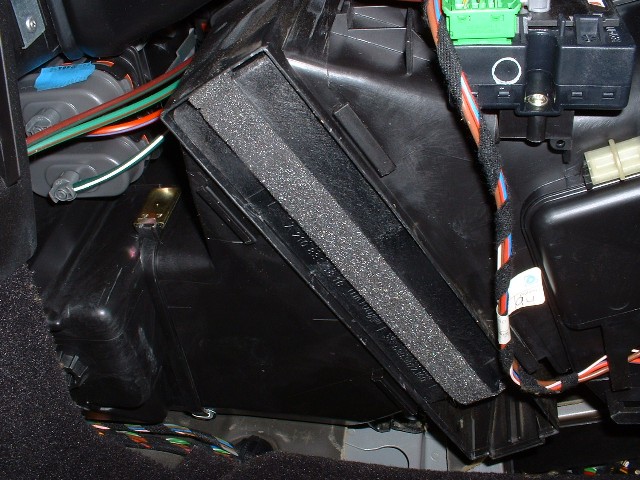
Here's the empty compartment.
Now insert the new filter into the compartment as shown:
This time rotate the filter in a clockwise direction in order to install it:
New filter completely inserted into the compartment:
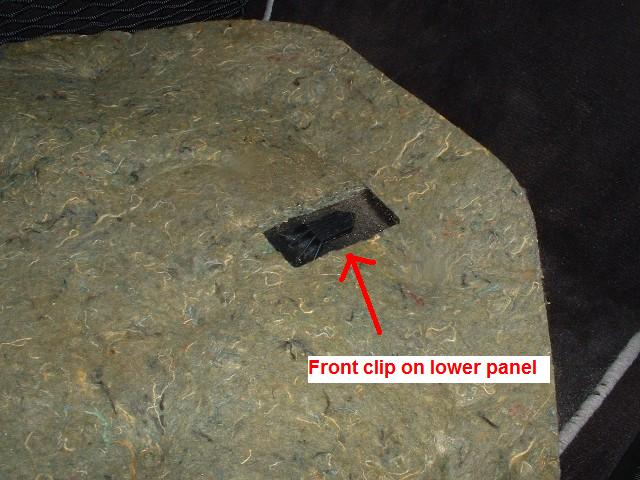
Note the tab on the front of the lower panel when reinstalling it:
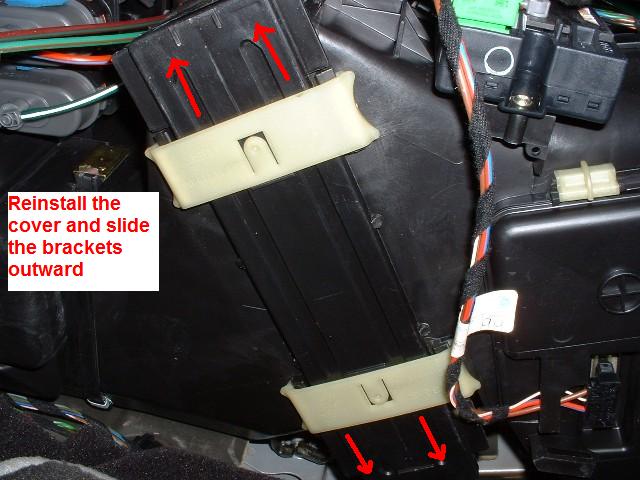
Reinstall the compartment cover and slide the brackets outward:
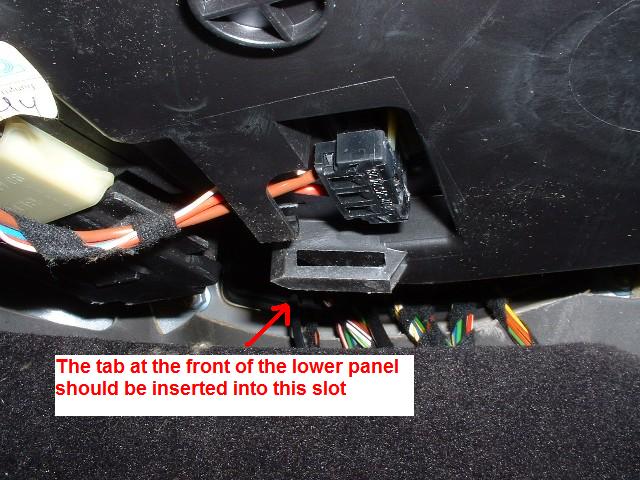
Replace the lower trim panel and insert the front tab into the slot as shown below:
Reinstall the three Phillips-head screws for the lower panel to compete the job:
That's all that's to it. Now enjoy breathing in nice clean air in the cabin. :)